When rounding off a perfect meal, dessert takes center stage. Elevate your culinary prowess with these top 5 dessert menu recipes that promise to tantalize taste buds and leave a lasting impression. From classic favorites to innovative delights, these recipes cater to diverse palates, ensuring a sweet finale for any occasion.
1: Chocolate Lava Cake Recipe
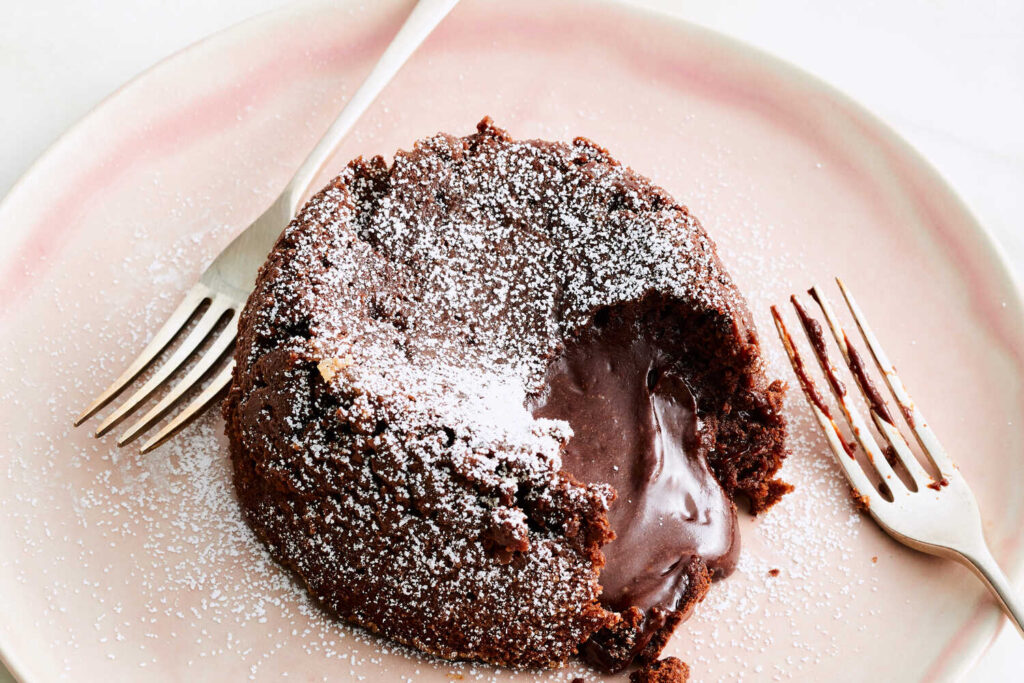
Are you craving a rich and luscious dessert that oozes with chocolatey goodness? Look no further! This Chocolate Lava Cake recipe is here to tantalize your taste buds and satisfy your sweet tooth. Whether for a special occasion or to treat yourself, this delectable dessert is a crowd-pleaser that will leave everyone asking for more.
Understanding the Essence of Chocolate Lava Cake
Chocolate Lava Cake, also known as Molten Chocolate Cake, is a delightful dessert famous for its irresistible gooey center. This dessert perfectly blends a light, spongy exterior and a warm, molten chocolate interior that flows out enticingly when you cut into it. The contrast between the slightly crisp outer layer and the creamy, melted chocolate inside creates a heavenly sensation with every spoonful.
Ingredients You’ll Need
Preparing this heavenly delight doesn’t require many ingredients. Here’s what you’ll need to create this chocolatey masterpiece:
- Dark Chocolate: High-quality dark chocolate is the star of this recipe, providing that intense and rich chocolate flavor. Aim for at least 70% cocoa content for the best results.
- Pro Tip: You can also experiment with different types of chocolate to personalize the taste according to your preferences.
- Unsalted Butter: Butter adds richness and moisture to the cake, ensuring a soft and tender texture.
- Eggs: Fresh eggs are essential for binding the ingredients together and providing structure to the cake.
- Granulated Sugar: To balance the bitterness of the dark chocolate, sugar is added to sweeten the cake batter.
- All-Purpose Flour: This ingredient gives the cake its structure and stability.
- Vanilla Extract: A vanilla splash enhances the flavor profile, complementing the chocolate beautifully.
- Salt: A pinch of salt enhances the chocolate’s flavor and balances the sweetness.
Step-by-Step Preparation
- Prepare the Chocolate Mix: Mix dark chocolate and butter using a double boiler or a microwave. Stir until smooth and well combined.
- Pro Tip: Be cautious while melting the chocolate to prevent burning. Opt for short intervals using a microwave or low heat while using a double boiler.
- Whisk the Eggs and Sugar: Whisk together the eggs and granulated sugar in a separate bowl until the mixture becomes pale and slightly thick.
- Pro Tip: Whisk the eggs and sugar vigorously to incorporate air into the mixture, resulting in a lighter cake texture.
- Combine the Ingredients: Gently fold the melted chocolate mixture into the egg and sugar mixture until fully incorporated.
- Pro Tip: Use a spatula and fold the ingredients gently to maintain the airiness of the batter.
- Add Flour and Flavorings: Gradually add the all-purpose flour, vanilla extract, and a pinch of salt to the batter. Fold until just combined. Overmixing may affect the cake’s texture.
- Pro Tip: Sift the flour before adding it to the batter to avoid lumps and ensure a smoother texture.
- Prepare the Ramekins: Grease them and dust them with cocoa powder or flour to prevent the cake from sticking.
- Bake to Perfection: Divide the batter evenly among the prepared ramekins and bake in a preheated oven until the edges are set, but the center remains soft and gooey.
- Pro Tip: Keep an eye on the baking time, which can vary depending on your oven. The ideal baking time is usually 10 to 12 minutes at the recommended temperature.
- Serve and Enjoy: Carefully remove the cakes from the ramekins, garnish with a dusting of powdered sugar or a scoop of vanilla ice cream, and indulge in the divine experience of warm, molten chocolate goodness.
2: Cheesecake Recipe
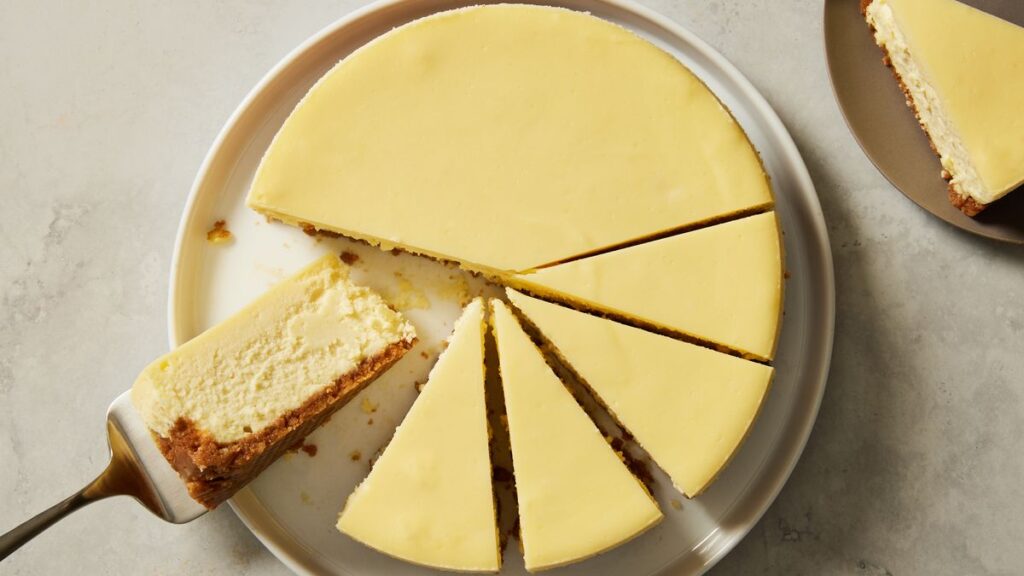
Are you craving a velvety, indulgent dessert that tantalizes your taste buds? Look no further than this impeccable cheesecake recipe! Dive into the world of creamy goodness and master creating a luscious cheesecake that will leave everyone craving more.
Unveiling the Art of Crafting the Ideal Cheesecake
Introduction to Cheesecake Magic
Cheesecake, a divine concoction of cream cheese, eggs, and sugar, has been a beloved dessert for centuries. Its rich, creamy texture and versatile flavors make it a dessert for any occasion.
Essential Ingredients
- Cream Cheese
- Opt for full-fat cream cheese for that perfect texture.
- Eggs
- Fresh, large eggs work wonders in binding the mixture.
- Sugar
- Use granulated sugar to balance the tanginess of the cream cheese.
- Graham Crackers
- Crush these to create a delectable crust.
- Butter
- Melted butter binds the crust together for that perfect base.
Step-by-Step Guide to Cheesecake Mastery
Creating the Crust
- Prepare the Graham Cracker Base
- Crush the crackers and mix them with melted butter.
- Press the mixture into the base of a springform pan.
Perfecting the Cheesecake Filling
- Cream Cheese Mixture
- Blend cream cheese until smooth.
- Gradually add sugar and beat until creamy.
- Incorporate eggs one at a time, mixing well after each addition.
Baking and Serving Tips
- Baking the Cheesecake
- Bake at a low temperature to prevent cracks.
- Use a water bath to ensure even cooking.
3: Tiramisu Recipe
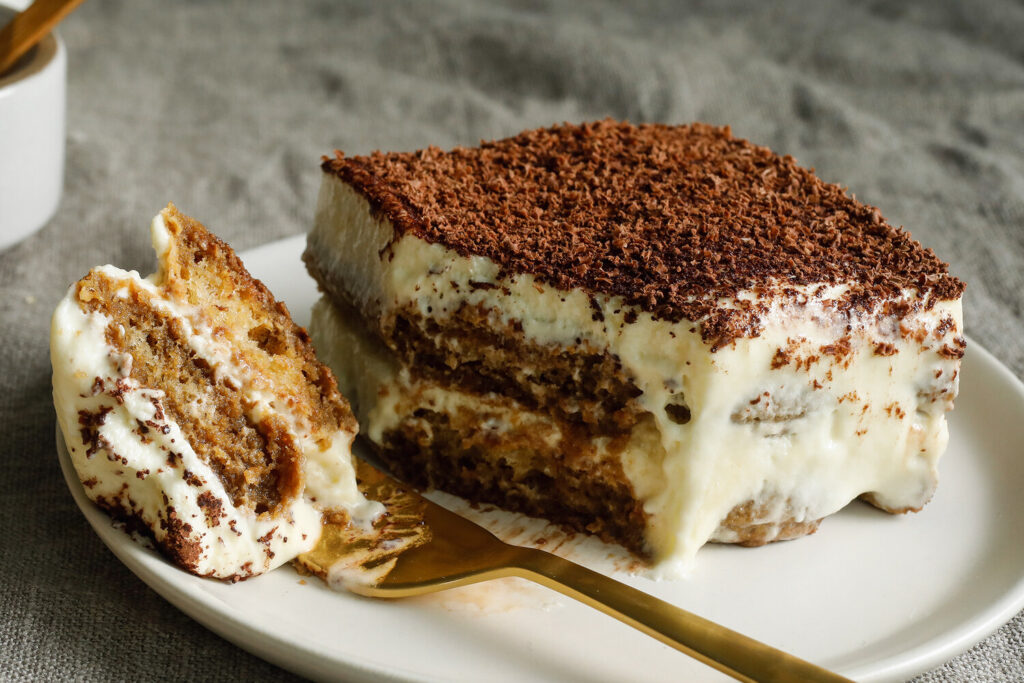
Tiramisu, the heavenly Italian dessert, is a symphony of flavors and textures that captivate the palate. This Tiramisu recipe unlocks the secrets to crafting this decadent delight in your kitchen. From the delicate balance of mascarpone to the hint of coffee-soaked ladyfingers, this guide ensures you achieve the authentic taste of Italy.
Understanding the Key Ingredients
Mascarpone Cheese: The Creamy Essence
- Quality Matters: Opt for fresh, high-quality mascarpone for an indulgent texture.
- Substitutes and Alternatives: Explore alternatives like cream cheese if mascarpone isn’t available.
Ladyfingers: The Foundation
- Selecting Ladyfingers: Choosing the right type and texture for the perfect base.
- Dipping Technique: How to infuse ladyfingers with the perfect coffee flavor.
Coffee and Liqueur: The Flavor Enhancers
- Choosing Coffee: Exploring different types for varying intensities.
- Liqueur Choices: Selecting the ideal liqueur to complement the dessert.
Step-by-Step Preparation Process
Step 1: Preparing the Mascarpone Mixture
- Method: Blending mascarpone, sugar, and vanilla for a smooth base.
- Pro Tip: Ensure all ingredients are at room temperature for seamless blending.
Step 2: Assembling the Layers
- Layering Technique: Strategically arrange the ladyfingers and mascarpone mixture.
- Layering Order: Understanding the optimal layering sequence for a balanced taste.
Step 3: Allowing the Flavors to Meld
- Chill Time: The importance of refrigeration and the ideal duration for flavor infusion.
- Covering Techniques: Ensuring the Tiramisu is properly covered to avoid moisture.
4: Creme Brulee Recipe
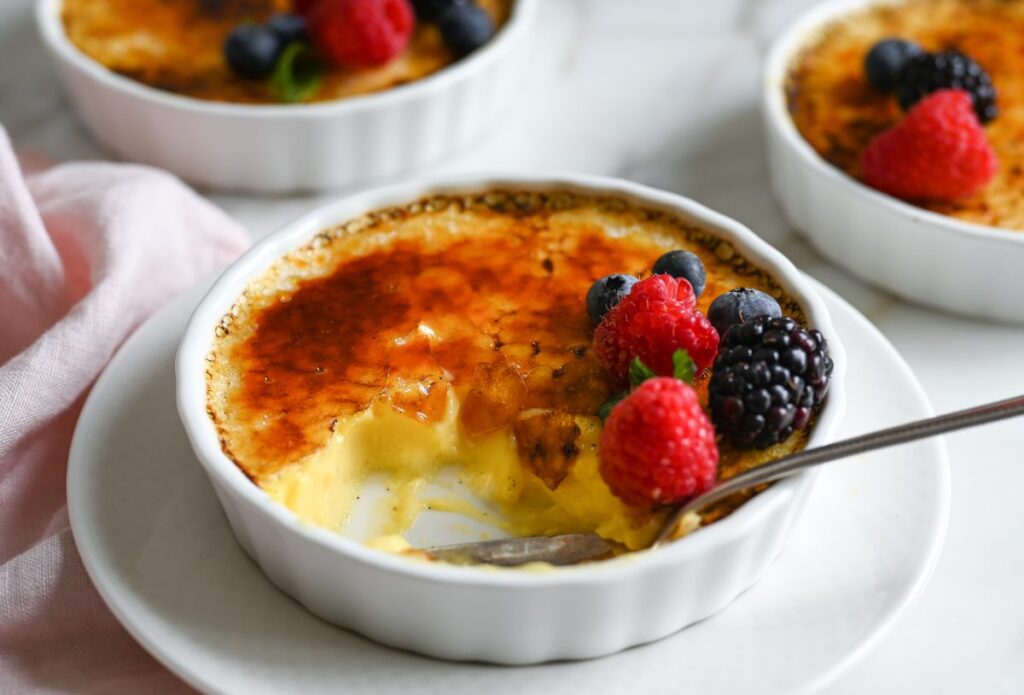
Creme Brulee, a quintessential French dessert, is renowned for its rich custard base and crisp caramelized sugar topping. Its simple yet sophisticated flavors have made it a beloved treat worldwide.
Ingredients for the Perfect Creme Brulee
Let’s gather the essentials to create this delectable dessert:
- Eggs: Choose fresh, high-quality eggs for a rich custard base.
- Tip: Opt for room-temperature eggs for smoother blending.
- Cream: Heavy cream provides a luxurious texture and richness.
- Sugar: Granulated sugar for the custard and for the iconic caramelized topping.
- Vanilla: Pure vanilla extract enhances the flavor profile.
Step-by-Step Preparation
Now, let’s dive into the step-by-step process to achieve Creme Brulee perfection:
Preparing the Custard Base
- Begin by heating the cream gently and infusing it with vanilla essence.
- Whisk egg yolks and sugar until smooth and pale in color.
- Gradually pour the warm cream into the egg mixture while whisking continuously.
Baking the Custard
- Carefully pour the custard into ramekins placed in a water bath.
- Bake until the custard sets but retains a slight jiggle in the center.
Creating the Caramelized Top
- Sprinkle a thin, even layer of sugar atop the chilled custard.
- Caramelize the sugar using a kitchen torch or broiler until golden and crisp.
Enhancing Your Creme Brulee Experience
Discover tips and variations to elevate your Creme Brulee:
- Flavor Infusions: Experiment with citrus zest, cinnamon, or espresso for unique twists.
- Tip: Steep flavors in the cream during the heating process for optimal infusion.
- Presentation: Garnish with fresh berries or a mint sprig for a delightful visual appeal.
- Texture Play: Explore texture contrasts by adding a layer of fruit compote beneath the custard.
5: Apple Pie Recipe
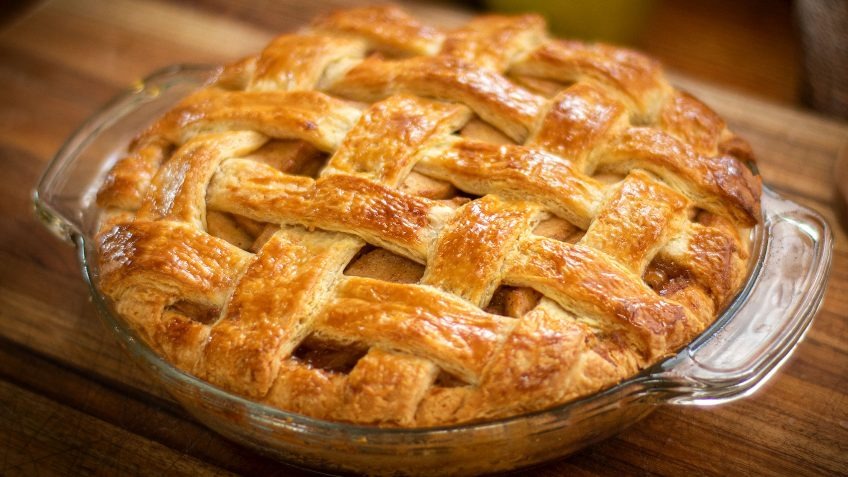
Regarding classic desserts that evoke warmth and nostalgia, few things compare to a delicious, homemade apple pie. With its flaky crust and sweet, cinnamon-infused apple filling, mastering the art of baking the perfect apple pie is a delightful journey that brings joy to both the baker and those who get to savor it.
Understanding the Essence of a Good Apple Pie
Creating a memorable apple pie goes beyond following a set of instructions. It’s about infusing love, care, and some culinary expertise into every process step.
The Ingredients You’ll Need
To start crafting your masterpiece, gather the following ingredients:
- For the Crust:
- Flour
- Butter
- Salt
- Cold water
- For the Filling:
- Apples (variety matters!)
- Sugar
- Cinnamon
- Lemon juice
- Cornstarch
Choosing the Right Apples
The success of your pie largely depends on the apples you choose. Each variety brings its unique flavor and texture, impacting the final result.
Step-by-Step Preparation
Making the Perfect Crust
Creating a flaky, golden crust is essential to a remarkable apple pie. Follow these steps to achieve pastry perfection:
- Preparing the Dough
- Mix flour and salt.
- Cut in butter until the mixture resembles coarse crumbs.
- Add cold water gradually, mixing until the dough comes together.
- Chilling the Dough
- Form the dough into a disk, wrap it, and chill for at least 30 minutes.
Crafting the Irresistible Filling
The heart of any apple pie is its filling. Here’s how to create a mouthwatering filling that’ll have everyone asking for seconds:
- Prepping the Apples
- Peel, core, and slice the apples evenly.
- Mixing the Ingredients
- Combine the apples with sugar, cinnamon, lemon juice, and cornstarch.
Assembling and Baking
Building the Pie
- Rolling Out the Dough
- Divide the dough and roll out the bottom crust.
- Adding the Filling
- Fill the pie crust with the apple mixture.
- Covering the Pie
- Roll out the top crust and cover the pie, sealing the edges.
Achieving Baking Perfection
- Preparation for Baking
- Brush the pie with an egg wash for a golden finish.
- Bake and Enjoy
- Bake until the crust is golden brown and the filling is bubbling.
The Finishing Touch
Serving Your Masterpiece
Allow the pie to cool slightly before serving. Pair it with a scoop of vanilla ice cream for an irresistible treat that will delight your taste buds.
Frequently Asked Questions
Q: Are these dessert recipes beginner-friendly?
Absolutely! Each recipe comes with easy-to-follow steps catering to both beginners and seasoned bakers.
Q: Can these recipes be customized for dietary preferences?
Certainly! Most recipes offer variations accommodating gluten-free, vegan, or other dietary preferences.
Q: How do I store these desserts for later consumption?
Properly stored, these desserts can be refrigerated or frozen for future enjoyment. Check individual recipes for specific storage guidelines.
Q: How can I create a balanced dessert menu for a dinner party?
To craft a well-rounded dessert menu, consider diversity in flavors, textures, and presentation. Include options like a rich chocolate dessert, a fruity delight, a creamy treat, and a lighter, refreshing option. Ensure a mix of baked, chilled, and bite-sized offerings for a diverse experience.
Q: Can I prepare these dessert menu items in advance?
Yes, many of these desserts can be prepared ahead of time. Some, like tarts and cakes, can be baked in advance and refrigerated or frozen. However, whipped cream-topped desserts or delicate pastries are best assembled closer to serving time to maintain freshness and texture.
Q: Can I make milkshakes with dairy-free alternatives?
Absolutely! You can substitute dairy milk with options like almond, coconut, oat, or soy milk to create delicious dairy-free milkshakes. Experiment with different alternatives to find the one that suits your taste preferences best.
Q: Can I make Chocolate Lava Cake ahead of time?
Yes, you can prepare the batter in advance and refrigerate it. Bake it just before serving for the perfect molten center.
Q: What can I serve with Chocolate Lava Cake?
It pairs wonderfully with a scoop of vanilla ice cream, fresh berries, or a dollop of whipped cream.
Q: Can I use low-fat cream cheese for the recipe?
While possible, using full-fat cream cheese ensures a richer and creamier texture.
Q: How do I prevent cracks on the cheesecake’s surface?
Avoid overmixing, and ensure the oven temperature is low and consistent during baking.
Q: How long can Tiramisu be refrigerated?
For optimal taste and texture, consume Tiramisu within 2-3 days of preparation if it lasts that long!
Q: What if I don’t have a kitchen torch?
While a kitchen torch provides the classic caramelized topping, a broiler can achieve similar results. Be vigilant to avoid over-browning.
Q: Can I use milk instead of cream?
Traditionally, Creme Brulee relies on the richness of heavy cream for its luxurious texture. However, substituting with milk will yield a lighter version.
Q: Can I freeze leftover waffles?
Yes, you can freeze waffles. Ensure they cool completely, then stack with parchment paper between each waffle before freezing. Reheat in a toaster for a quick breakfast.
Q: What are the best apples to use for apple pie?
Opt for a mix of tart and sweet apples like Granny Smith, Honeycrisp, or Jonagold. Mixing varieties adds depth to the flavor and texture of your pie.
Q: How do I prevent my apple pie from becoming too watery?
Tossing the sliced apples with sugar and letting them sit before assembling the pie helps draw out excess moisture. A thickening agent like cornstarch or flour in the filling also helps absorb excess liquid during baking.


